User guide
pobvol Service Solution
Power App pssService Board
Version: 9'25
Deutsch /
English
User guide
pobvol Service Solution
Power App pssService Board
Version: 9'25
Deutsch /
English
Customer data is needed by your service team for the planning and documentation of service activities. The data can be imported from a connected database. App admins manage it (add, edit, delete) with the the app pssService Board. The data is stored in the SharePoint list (SP list) "Servicekunden".
The customer icon
Number of service customers
Service customers overview I
Service customers overview II
The customer data
The customer inventory
Add/edit customer data
Connect a database
Top ↑
Users will find the customer icon on every screen of the app pssService Board on the left upper corner.
Top ↑
The start screen of the app pssService Board shows the number of stored service customers in the area 'Master Data'.

Top ↑
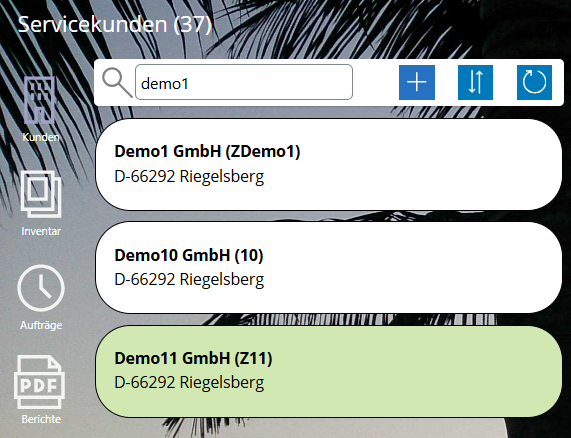
On the start screen of the app pssService Board, you will find a customer overview in the 'Service customers' section.
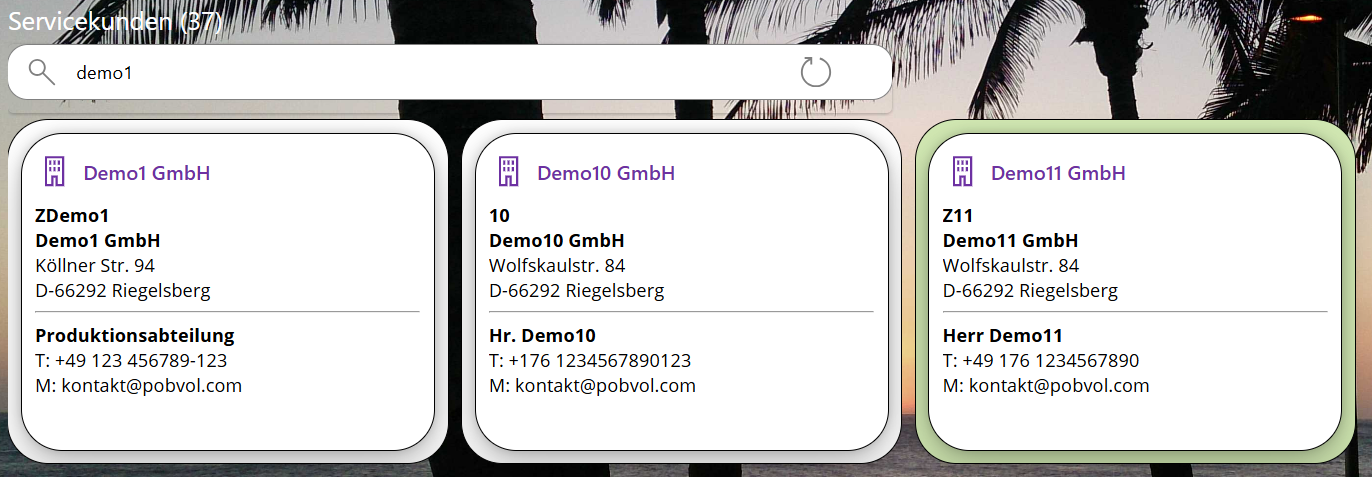
To filter the list, simply enter a search term in the search field. Customers will then be displayed where the search term is found. This includes checking customer number, customer name, street, postal code, customer location, country, contact person, phone, and email.
The list is sorted by customer name.
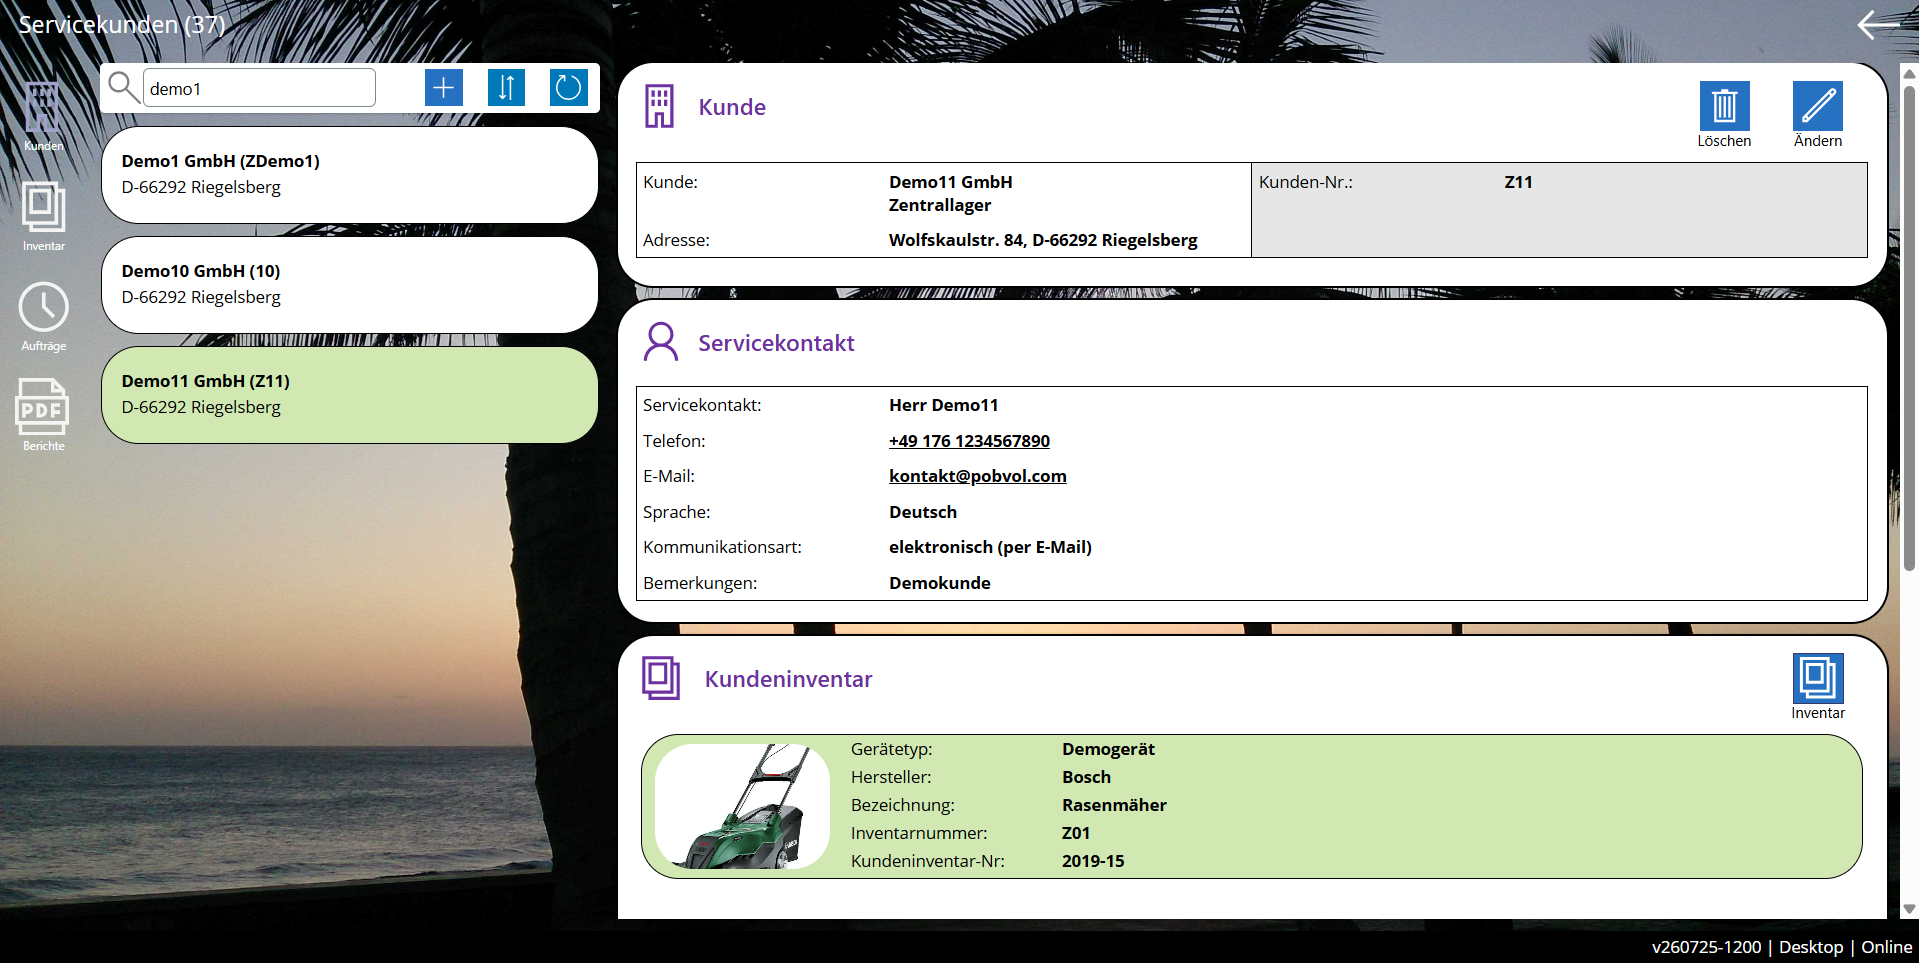
A click on an entry opens the 'Service customers' screen. The service customers overview with the detail display will be shown and the selected customer will be displayed.
Top ↑
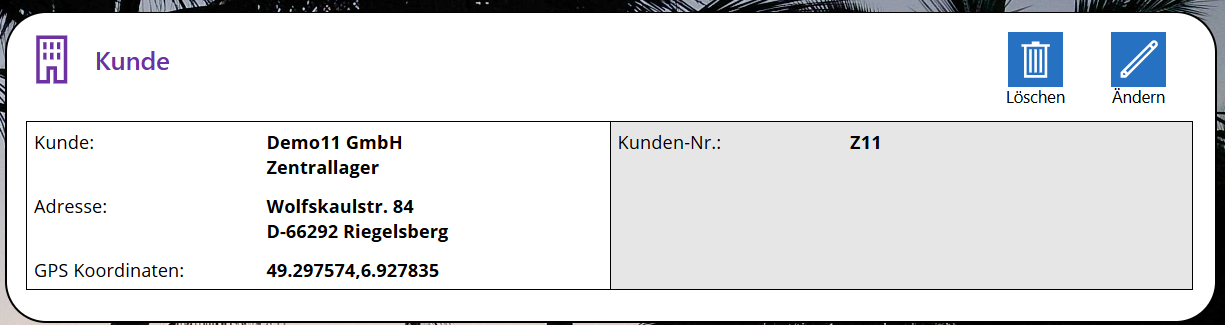
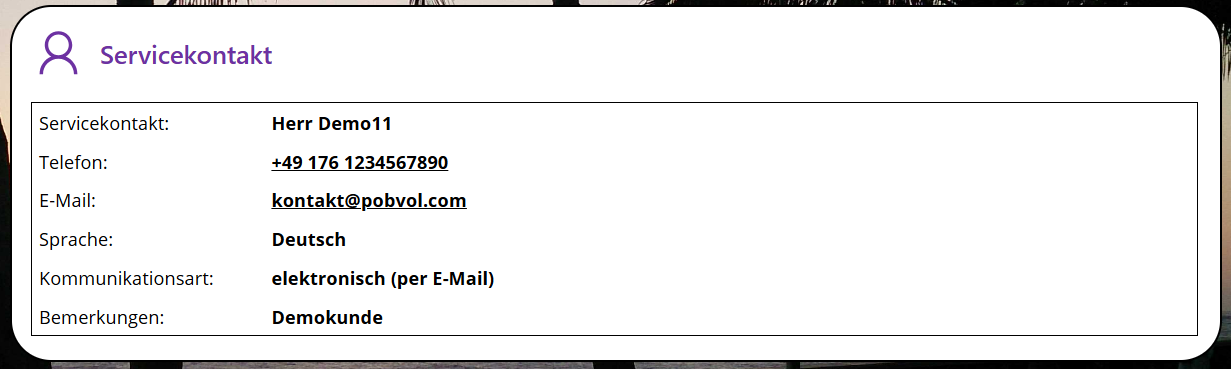
By clicking on a customer, the customer data will be displayed in the details view.
Top ↑
Top ↑
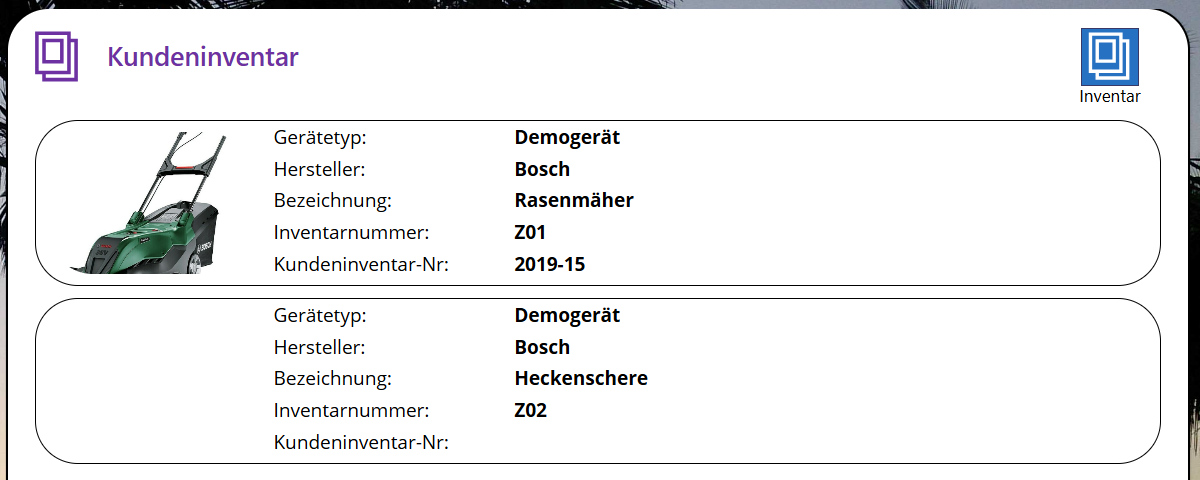
A click on an entry opens the "Customer Inventory" screen. The inventory overview with the details will be shown. The entire inventory of the customer is listed and the selected inventory is displayed.
Top ↑
Users who belong to the app user group 'App-Admins' can add and edit customer data on the 'Service customers' screen.
![]() Add customer: By clicking on this icon in the overview container, a customer can be added. The icon is only visible to users who belong to the app user group App-Admins.
Add customer: By clicking on this icon in the overview container, a customer can be added. The icon is only visible to users who belong to the app user group App-Admins.
![]() Edit: By clicking on this icon in the customer container, the edit mode can be accessed. The icon is only visible to users who belong to the app user group App Admins.
Edit: By clicking on this icon in the customer container, the edit mode can be accessed. The icon is only visible to users who belong to the app user group App Admins.
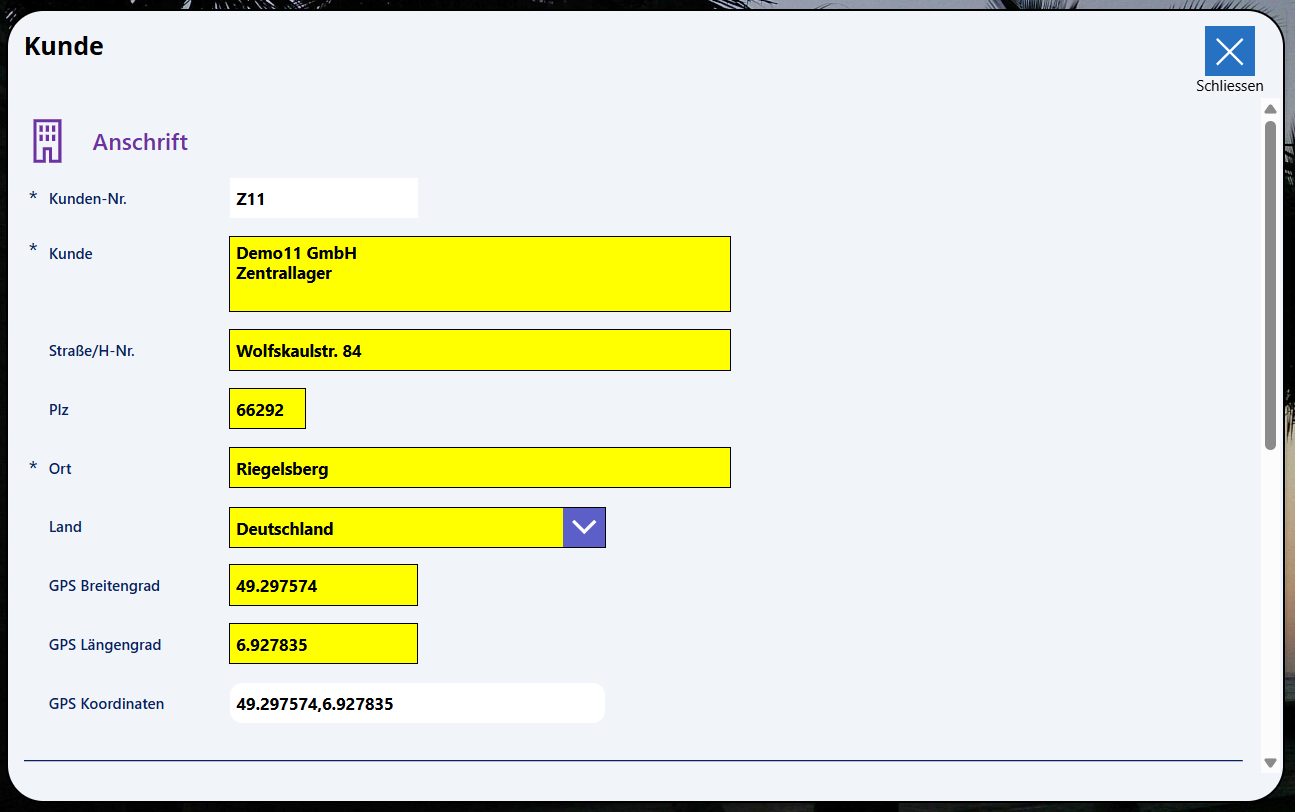
Enter a unique customer number. Please enter the correct customer number. This will automatically import customer's data from an connected database. If you would like to add customers without connection to you database, your app admin shall use a separate numbering system (e.g. ZDemo7).
Enter the customer data. Mandatory fields are customer number, name and city as this information is required for all activities.
Scroll down and enter the contact details. A service contact with phone and email is required so that your service team can contact the customer.
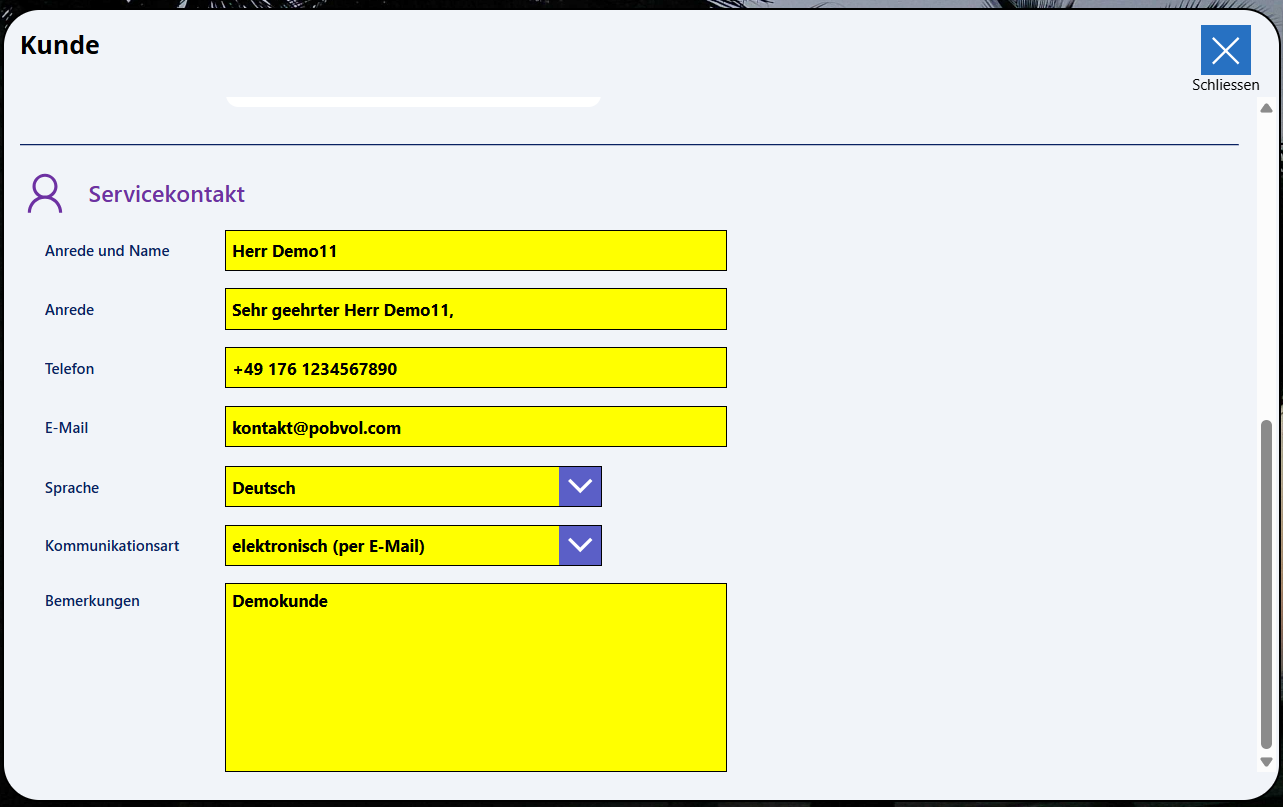
The language aids in communication with the customer. Currently, German and English are possible. The solution utilizes the language for the automatic creation of service reports, emails, and letters.
Also define the type of communication. Possible options are "by post (by letter)" and "electronically (by email)." If the customer wishes to communicate by email, approved service reports will be sent automatically to the customer via email.
Entered data has already been saved. Therefore, a single click on the close icon is sufficient to exit the editing mode.
Top ↑
Service customers and customer devices can be imported from a connected database.
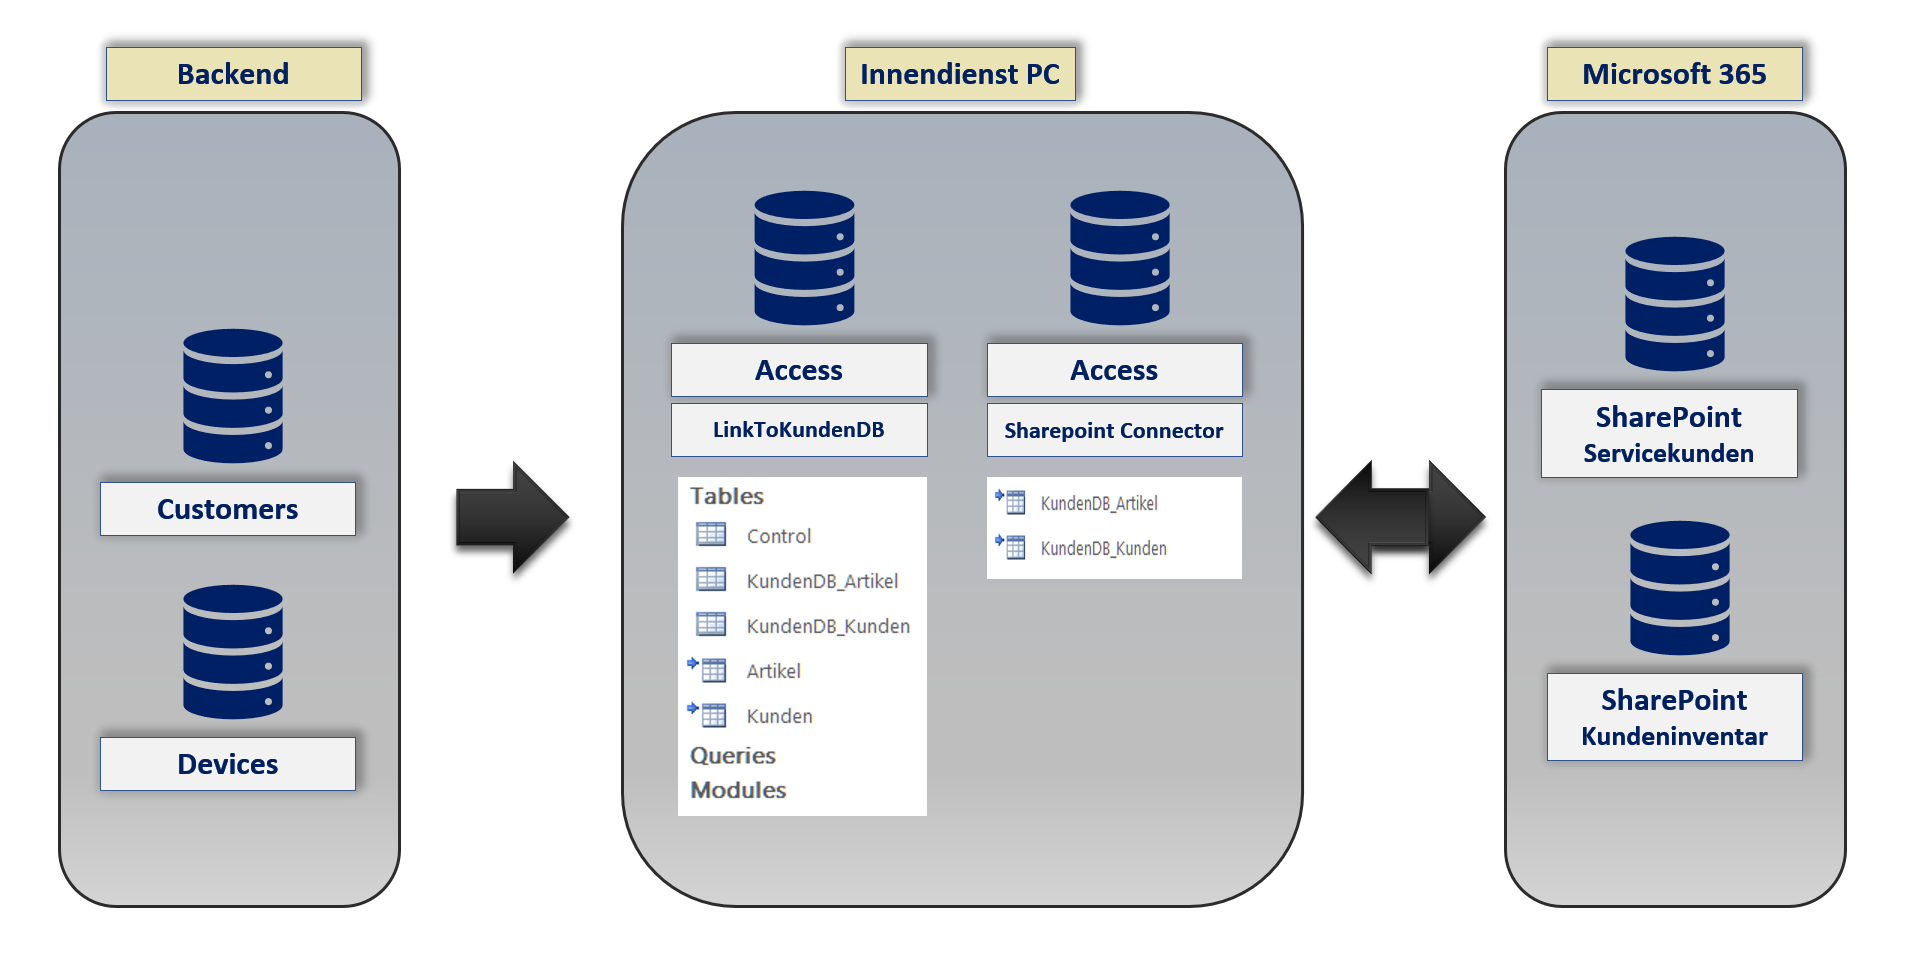
Only the master data that is needed will be imported!
Is the demo data flag set?
Is a service activity assigned to the customer or the device?
Is the customer listed in SharePoint list "Servicekunden"?
Is the device listed in SharePoint list "Kundeninventar"?
Customers are identified by the customer number. Therefore, the app admins must enter the correct customer number when adding new customers in the app. For customers without a connection to a database, a separate number range should be used (e.g. ZDemo7).